What is WooCommerce?
WooCommerce is an open-source plugin for wordpress that allows creating online eCommerce sites. The plugin is easy to set up and is being used by thousands of businesses around the world.
WooCommerce with PayGlocal
Integrating your WooCommerce store with PayGlocal allows you to accept online payments securely through net banking and debit/credit card. Our WooCommerce plugin makes the PayGlocal integration seamless for the merchants.
Note:Before following the steps mentioned below, ensure that you have a merchant account with PayGlocal. Contact us to create one now!
Plugin Download
Download the zip package based on your PHP version. (Incase you are not able to see the package for your PHP version, kindly reach out to your account manager.)
Plugin Installation
Follow below steps to install our WooCommerce plugin and start accepting payments from today!
Technical RequirementsPHP Version: 7.0 or higher
Woo Commerce Version: x.x.x.
Minimum Space: 25MB
1 Login to your Wordpress admin panel.
2 From the left navigation, Go to Plugins -> Installed Plugins -> Add New
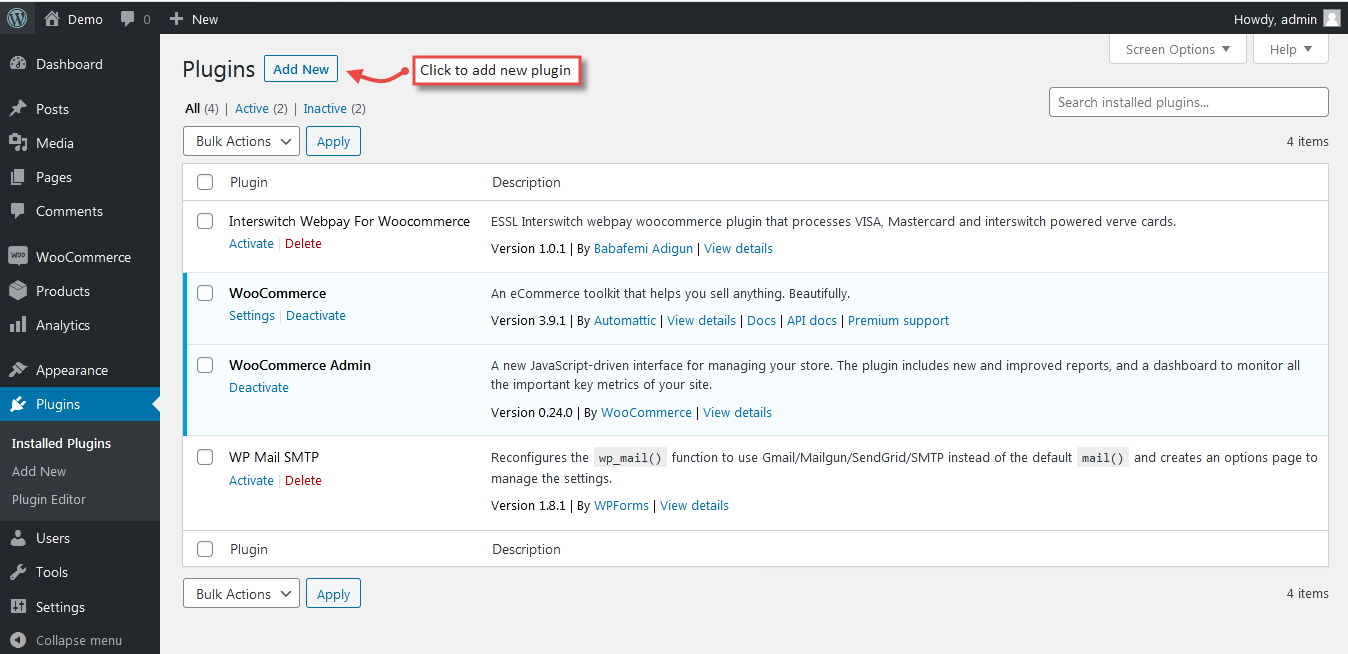
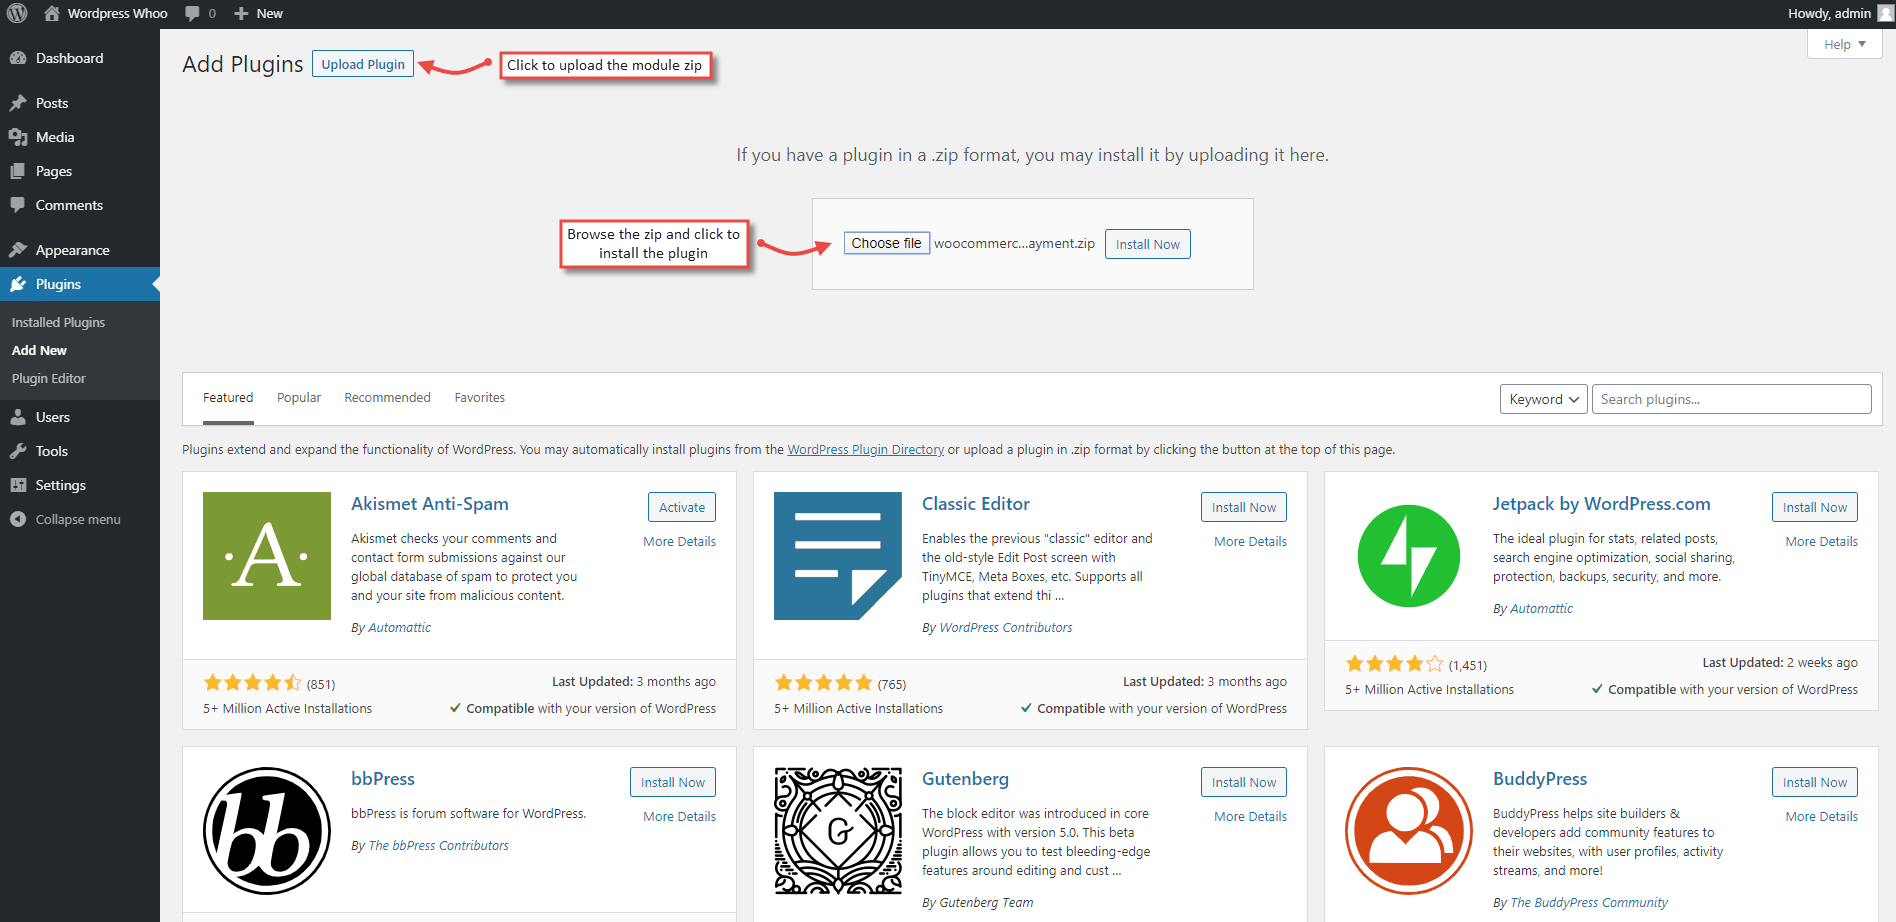
3 Click on Upload Plugin.
4 Wordpress will ask you to upload a zip package. Upload the downloaded zip package.
5 Click on Install now.
Configuration
1 After installation, log into your WordPress admin panel.
2 navigate to the WordPress Plugin Manager to activate the plugin.
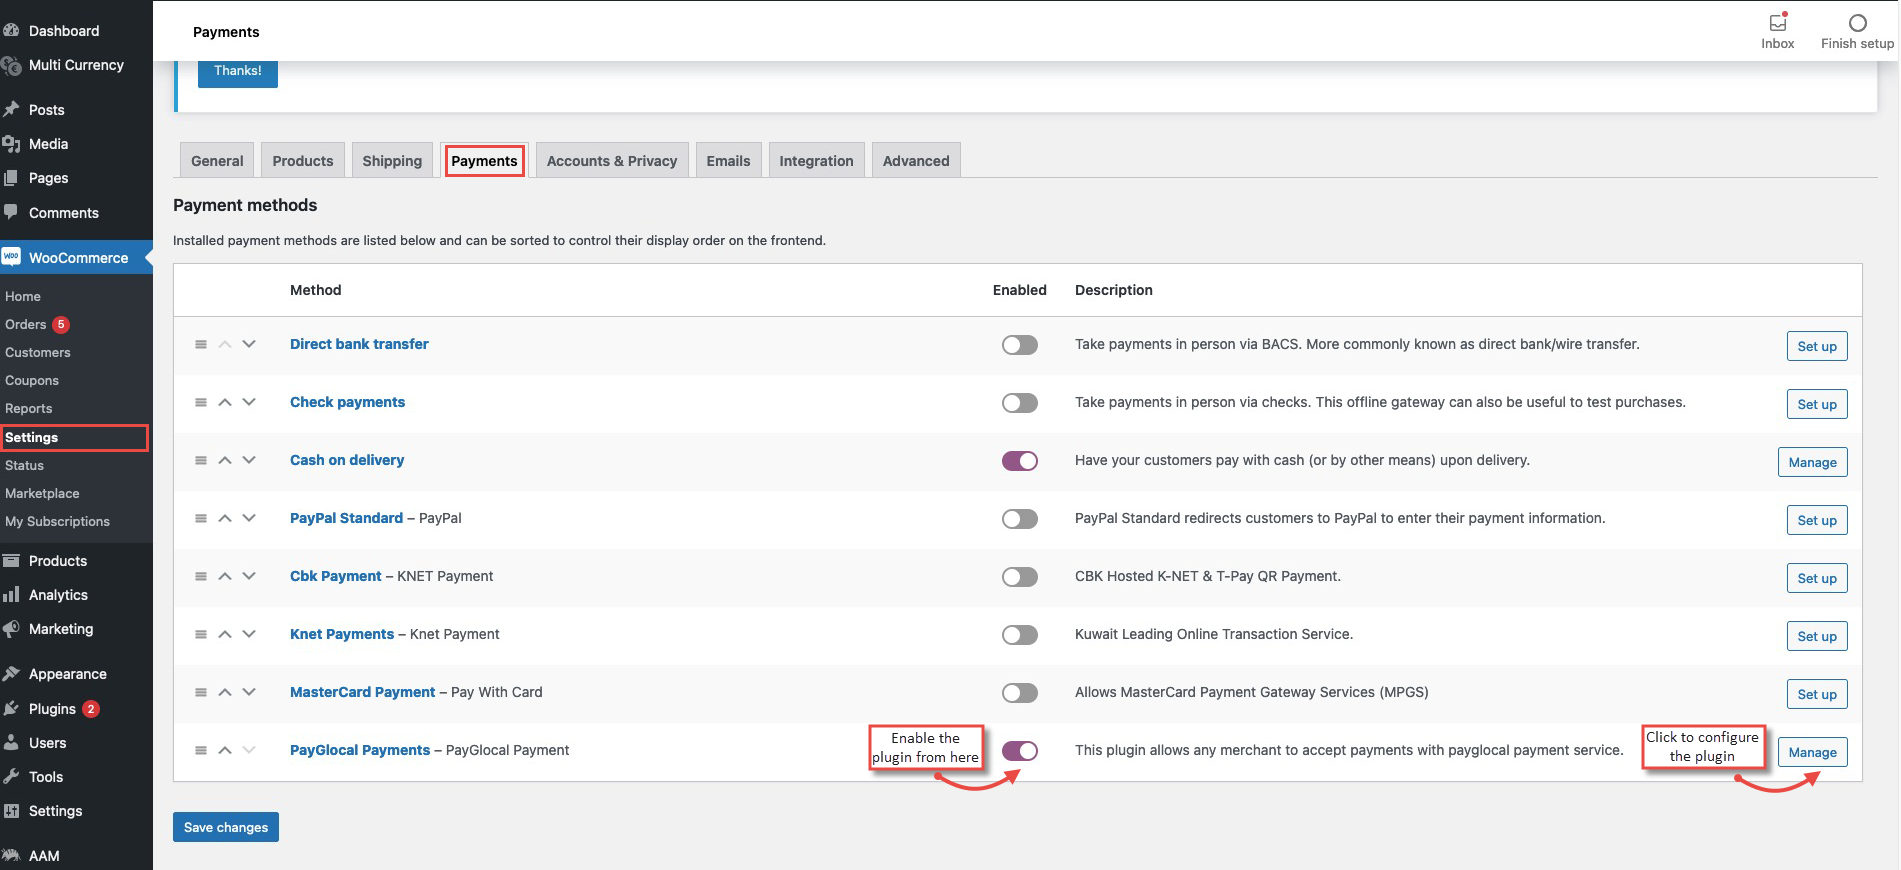
3 Go to Settings -> Payments, find the PayGlocal Payments in the list and enable it.
4 Click on Manage to configure it.
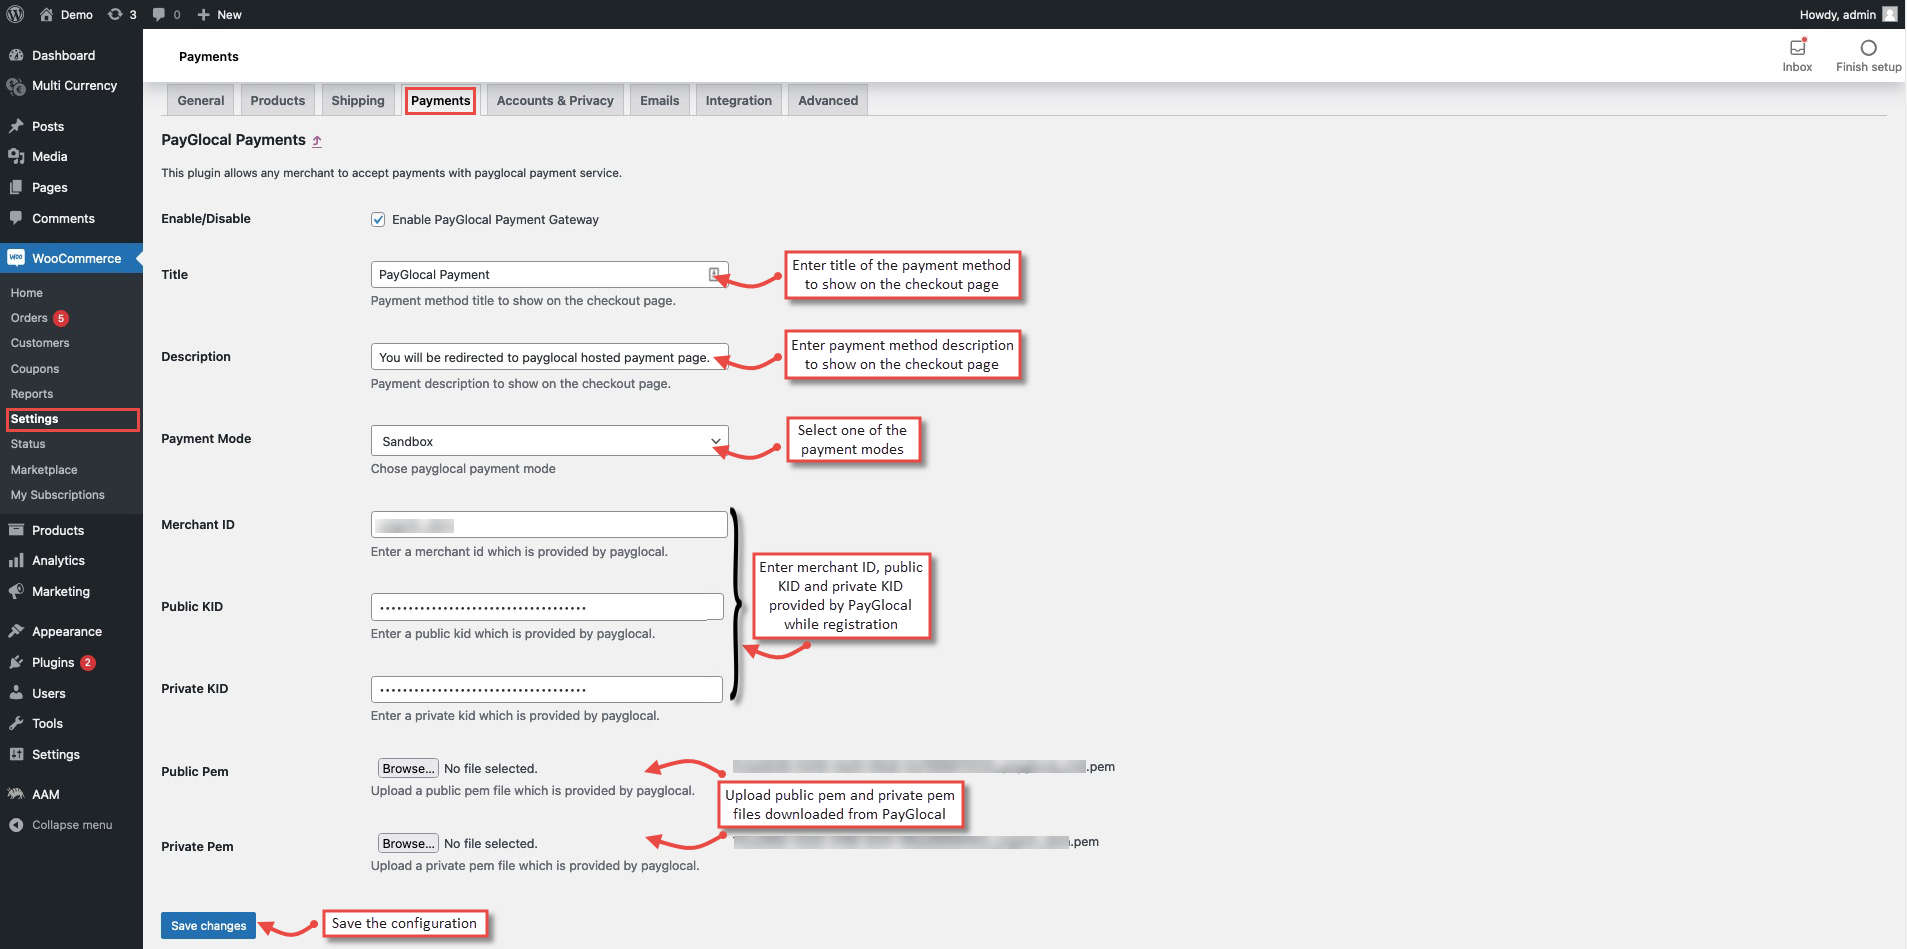
5 Configure the plugin as shown below:
- Enable/Disable: Enable or disable the PayGlocal extension from here.
- Title: Enter a custom title for the PayGlocal payments, which will be shown to the customers on the frontend.
- Description: Add description for the PayGlocal payments that will be displayed to the customers on the frontend.
- Merchant ID: Enter the merchant ID received from the PayGlocal dashboard. You can log into your PayGlocal merchant account, and copy the merchant ID from the top bar.
- Public Key: Enter the public key from the PayGlocal merchant account.
- Private Key: Enter the private key from the PayGlocal merchant account.
- Public PEM: Download the public pem file from the merchant account and upload it here.
- Private PEM: Download the private pem file from the merchant account and upload it here.
(Refer to the Key Management Section for more details on the above 4 points.)
6 Click on the Save Changes button to save the configuration.
Setup SuccessfulAfter following the steps mentioned above, your WooCommerce store is ready to accept online payments from the customers using PayGlocal Payments!
User Journey
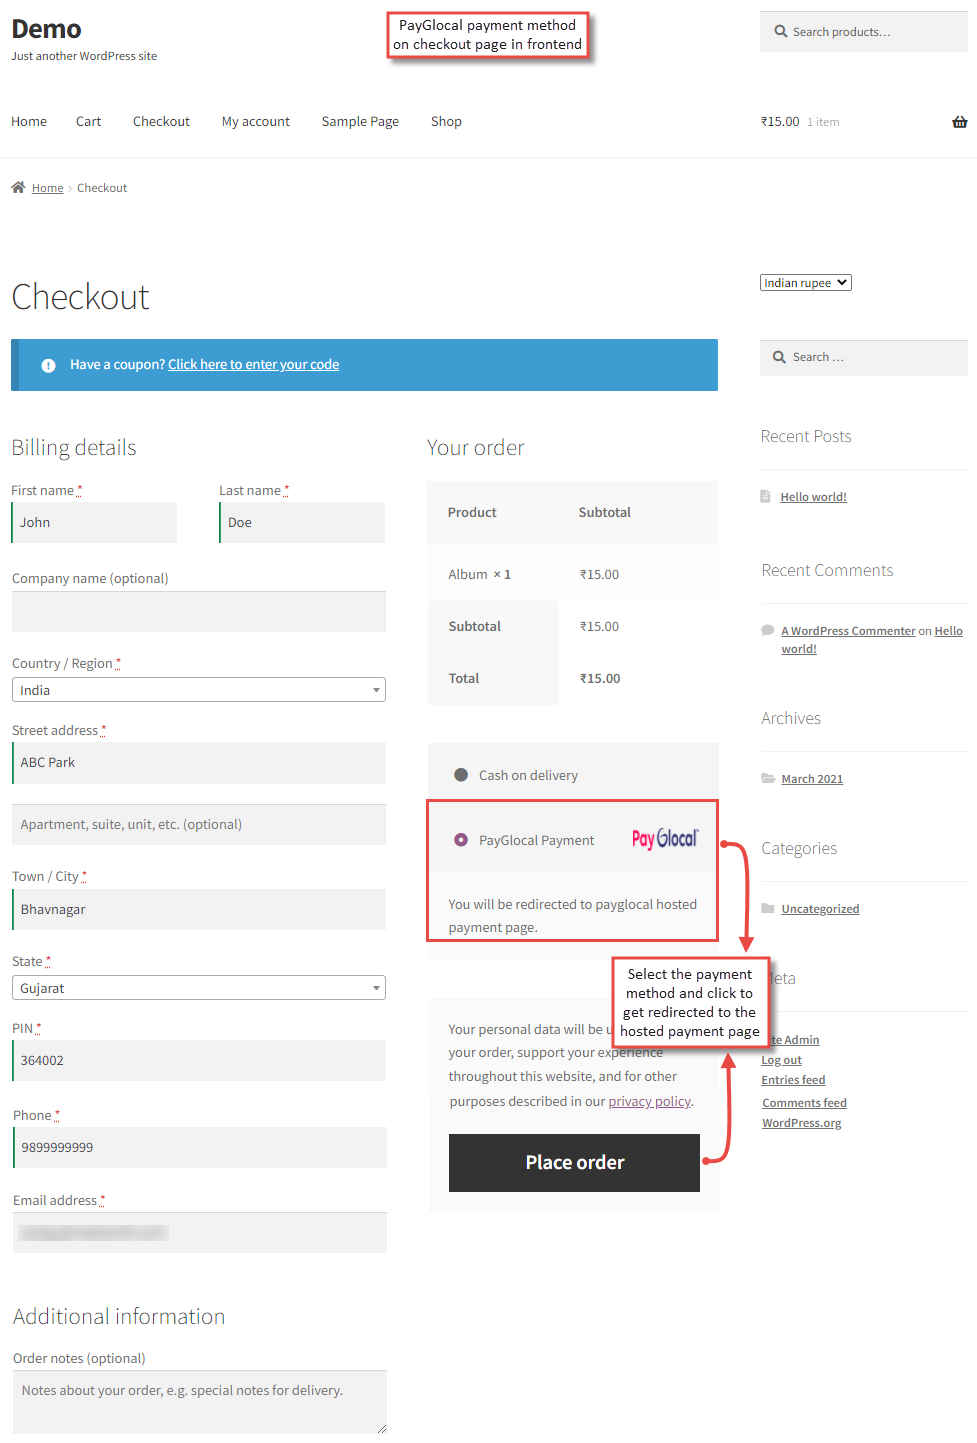
Once the user has checkout on your website, they can see the PayGlocal payment method on the checkout page in the frontend.
1 Select it and proceed to payment to get redirected to Payglocal page to complete the payment.
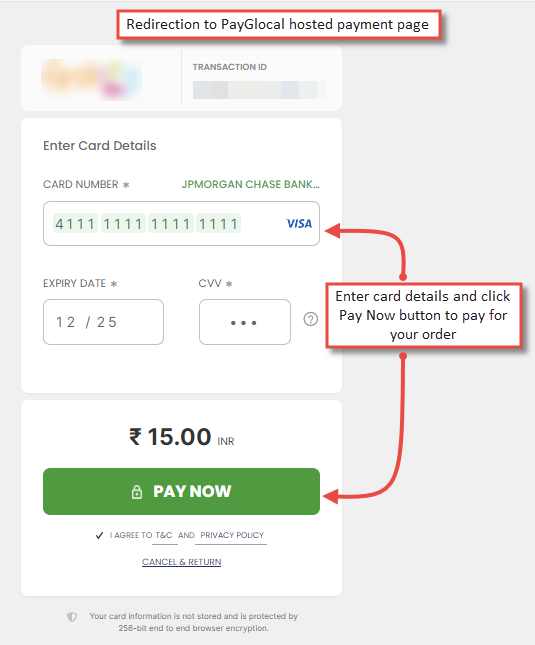
2 User is redirected to PayGlocal payment page.
2 They can add their card details and click on Pay Now to pay.
3 Once the payment is processed, user will be redirected back to merchant website.
3 After the order is placed, customers can see PayGlocal payment and txn details in their dashboard.
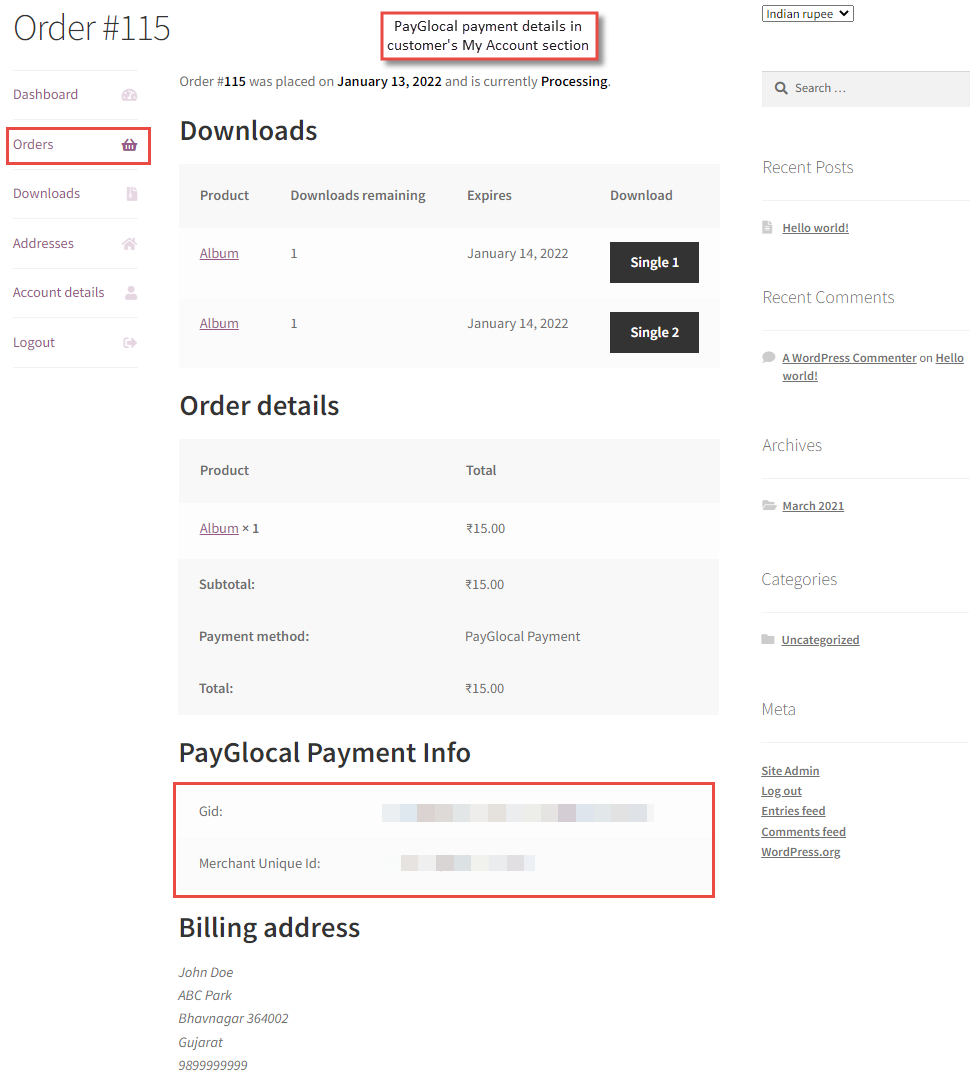
4 If you are the admin of the website, you can view the PayGlocal payment information.
4 Go to the Orders -> Order View section in the WooCommerce admin panel.
