What is Magento 2?
Magento 2 is a powerful and highly versatile eCommerce platform which is used by many of the leading businesses around the world. Acquired by Adobe and now known as Adobe Commerce, Magento 2 comes with an extensive range of built-in features and functionalities that makes sell online easier.
Magento 2 with PayGlocal
Integrating PayGlocal payment gateway with Magento 2 facilitates the store owners to accept online payments securely. The Magento 2 extension for the PayGlocal makes the integration easier for the online store owners and accepts online payments through internet banking and debit/credit cards.
Note: Before following the steps mentioned below, ensure that you have a merchant account with PayGlocal. Contact us to create one now!
Plugin Download
Download the Magento 2 extension from the linked provided here and continue.
Plugin Installation
1 Extract the zip folder and upload our extension to the root of your Magento 2 directory via FTP.
2 Login to your control panel, from the SSH, run the below commands:
php bin/magento setup:upgrade- For Magento version 2.0.x to 2.1.x -
php bin/magento setup:static-content:deploy - For Magento version 2.2.x & above -
php bin/magento setup:static-content:deploy –f php bin/magento cache:flush
Configuration
1 Log into your Magento 2 admin panel.
1 Go to Stores -> Configuration -> Sales -> Payment Methods -> PayGlocal Payment.
1 Configure the extension.
2 Now configure the extension as illustrated below.
- Enabled:Enable PayGlocal Payment Gateway extension from here.
- Title: Enter title for the PayGlocal payment method to show in the frontend.
- Show PayGlocal Logo: Select YES to show PayGlocal logo on the checkout page in frontend.
- Sandbox Mode: Set YES to enable sandbox mode for the payment gateway.
- Merchant ID: Enter your merchant ID received from the PayGlocal dashboard. You can log into your PayGlocal merchant account, and copy the merchant ID from the top bar.
- Public Key: Enter the PayGlocal public key received from the merchant account dashboard.
- Private Key: Enter the PayGlocal private key received from the merchant account dashboard.
- Public PEM: Upload the public pem file downloaded from the PayGlocal merchant account dashboard.
- Private PEM: Upload the private pem file downloaded from the PayGlocal merchant account dashboard. (Refer to the Key Management Section for more details on the above 4 points.)
- Allow Auto Invoice: Select ‘Yes’ to auto-generate invoices for the orders paid using PayGlocal payment method.
- Payment from Applicable Countries: Select whether you want to allow customers from all or only selected countries to use the payment method.
- Payment from Specific Countries: Select all the allowed countries to use the PayGlocal payment gateway.
- Title: Enter a custom title that you want to display on the frontend for the PayGlocal payment method.
- Additional Information: Enter a custom information to show to the customers on the frontend while using the PayGlocal payment method.
- Debug: Enable or disable the debug mode as per your requirements.
- Sort Order: Enter the order in which you want to display the payment method on the frontend.
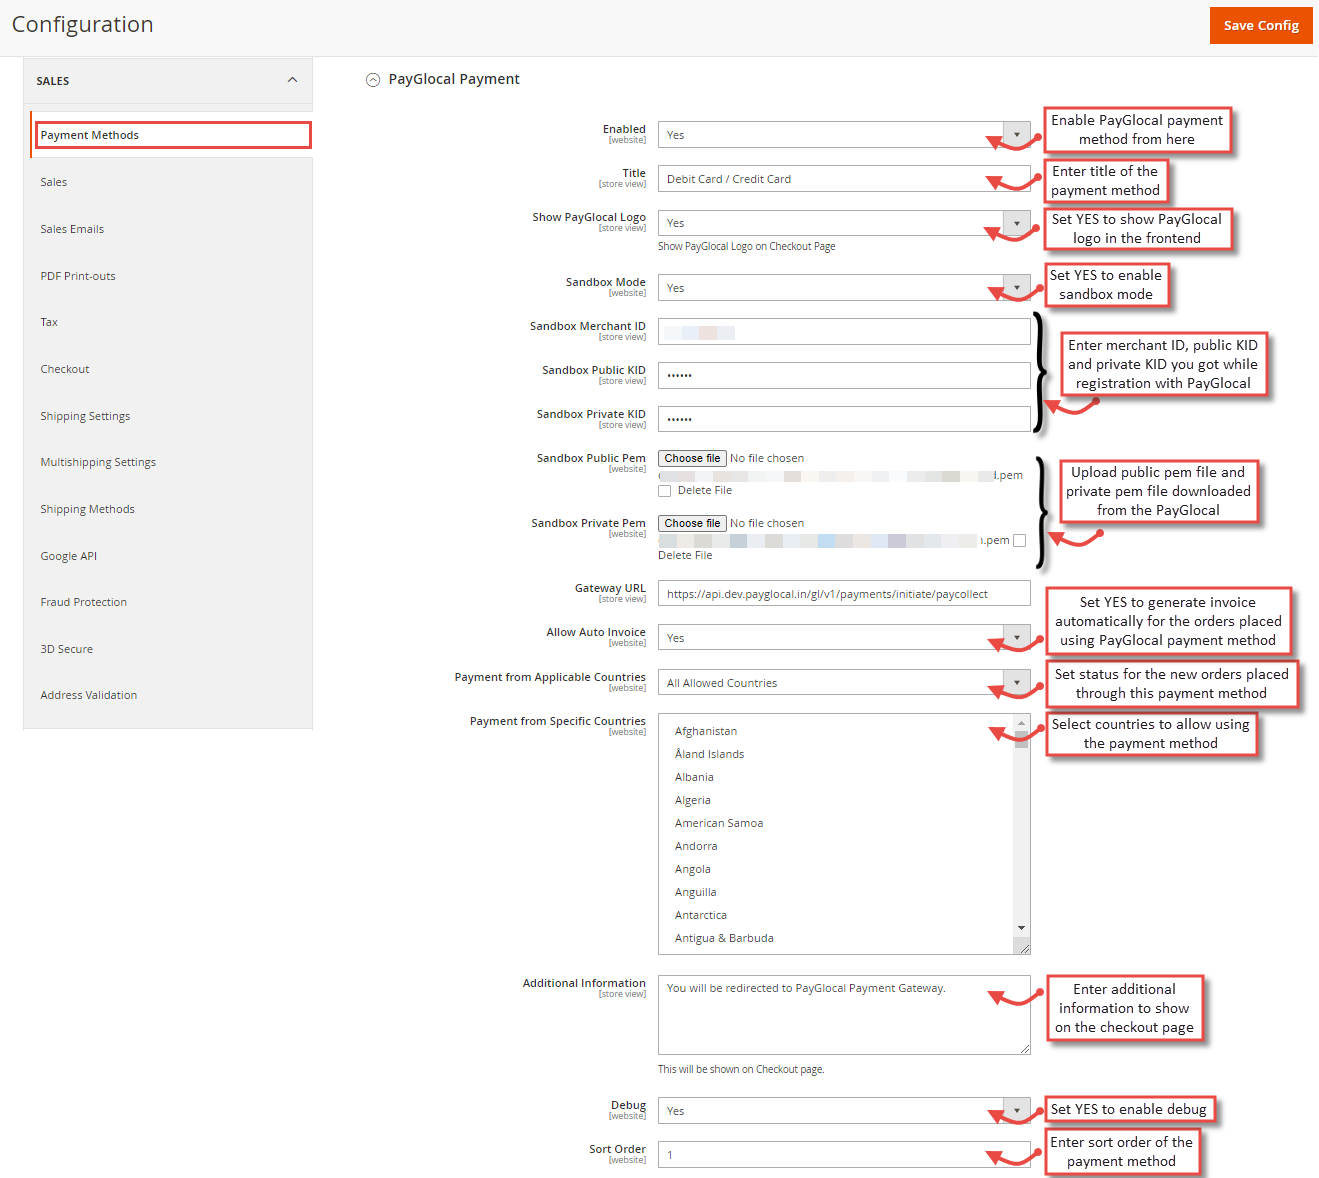
3Click on the Save Config button at the top-right corner of the page.
Setup SuccessfulOnce, you have followed all the steps mentioned above, the PayGlocal payment gateway is successfully set up with your Magento 2 store.
User Journey
1 Once the extension is configured, it can seen enabled in the frontend.
1 Simply add products to cart and go to the checkout.
1 select PayGlocal Payment method and click on the Continue button.
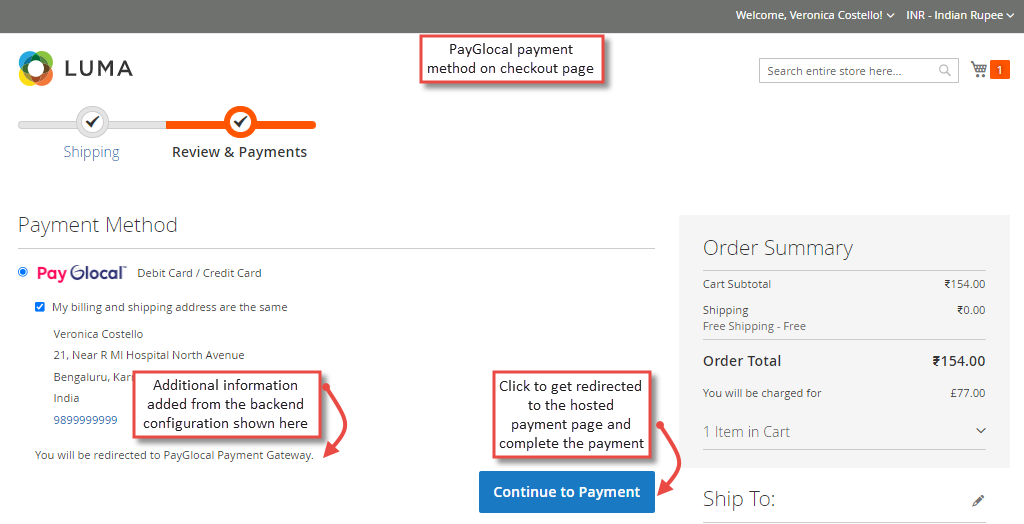
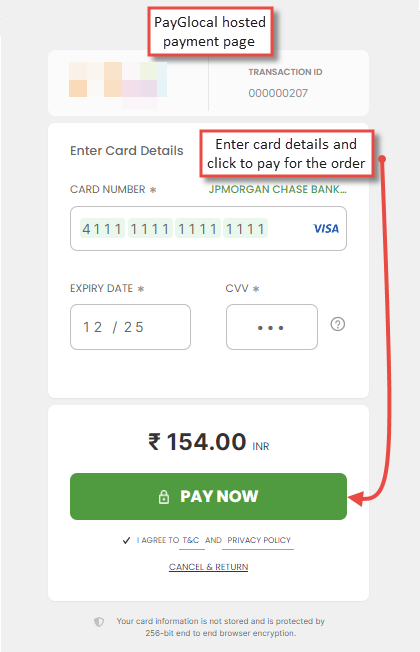
2 On click of Place Order button, the user gets redirected to the PayGlocal hosted page.
2 Here, the user can enter their card details and click Pay Now to pay successfully for the order.
3 Immediately after the order is placed, the PayGlocal Payment details can be seen.
3 Here, we can view the tab under the customer’s My Account section.
4 Apart from the customer’s My Account section, the admin can also see PayGlocal payment details.
4 This is from the Sales -> Orders-> Order View section in the backend.

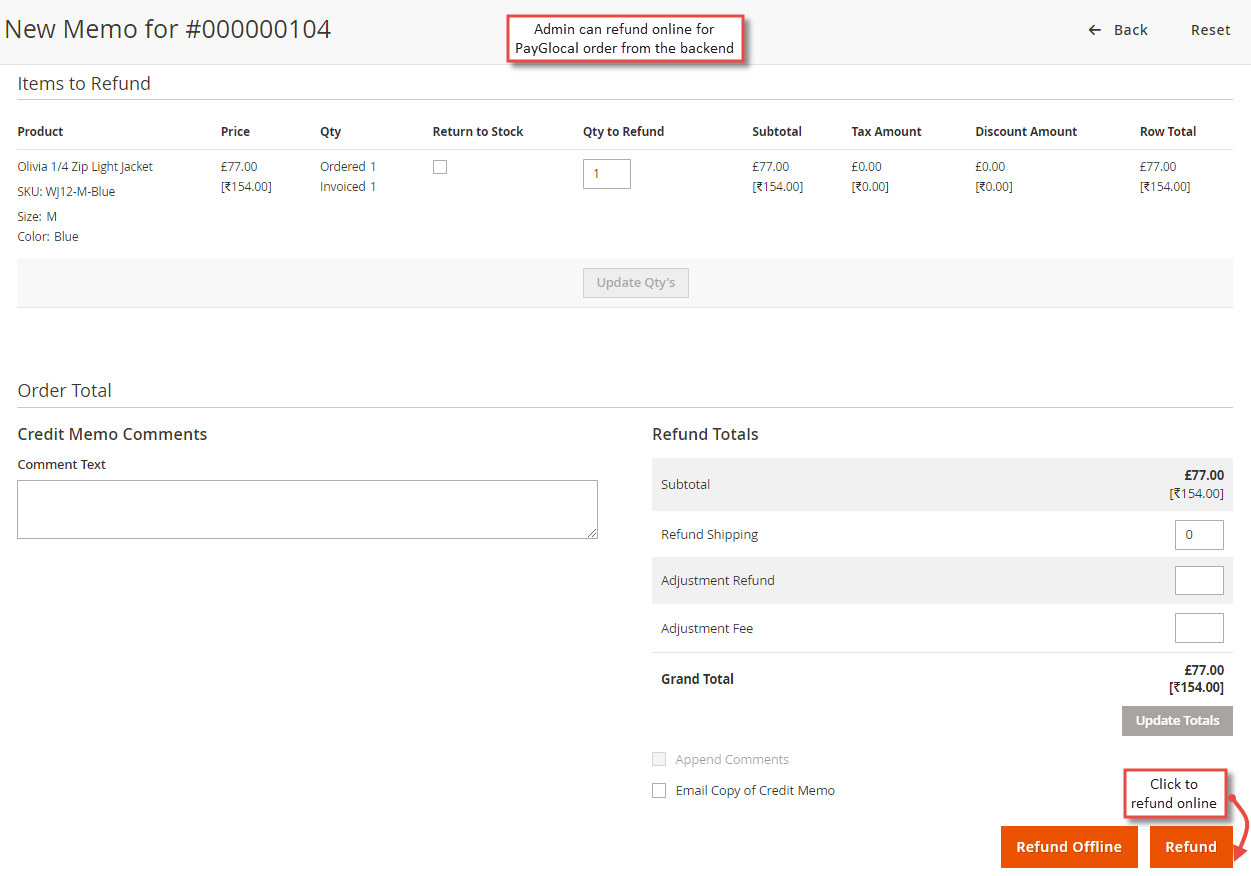
5 The extension is compatible with online refund through PayGlocal payment method by an Admin
- Navigate to Sales -> Invoices -> View Invoice
- Click on Credit Memo button
- While creating a new credit memo, click on Refund button to refund online through PayGlocal payment method for your order.